If you've been using another financial software product, and you'd like to import loan disbursements information from that product into Loan Performer, you can do so if the product allows you to export to a spreadsheet, dBase or text file. Loan disbursements can be imported from three file formats, i.e., dBase, Microsoft Excel or Tab delimited text files. Each of these files has a standard file format on how data should be arranged.
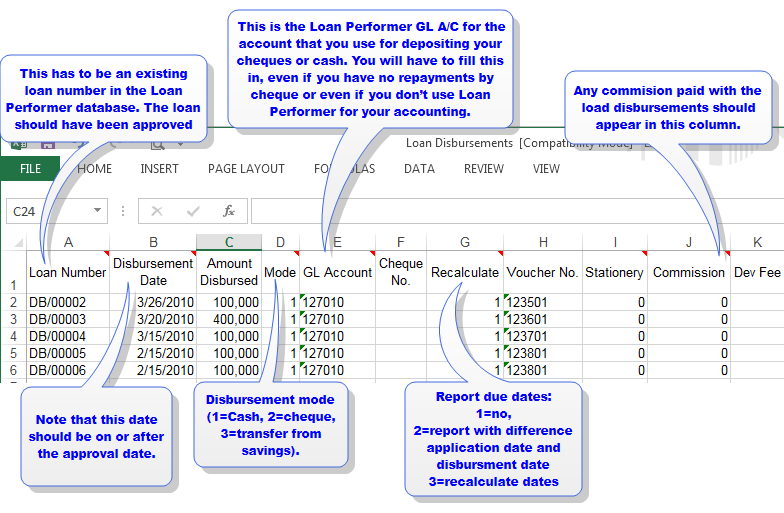
These loan disbursements templates can be downloaded from the Loan Performer Downloads page or got from the Loan Performer working folder under the import file folder, e.g., "C:\LPF81204\External Files\Import" It will be under the file name Loan Disbursements and it looks like the one below:
How to Import Loans disbursements
To import loan disbursements you go to Loans\Loan Importations\Import Loan disbursements and a screen like the one below shows up:
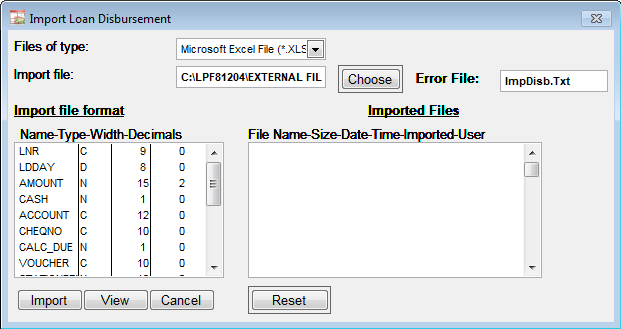
Files of type: Specify the import file type in the files of type: box, e.g., "Microsoft Excel File".
Import file: Specify the full path to the file that should be imported in the Import file text box, e.g., "C:\LPF81204\EXTERNAL FILES\IMP": Alternatively click on the Choose command button to select the file from a specified location.
Error File: Specify the name of the file to which errors will be written,e.g., "ImpDisb.Txt".
Import file format: This scroll window lists the various fields of the file to be imported and their properties.
Imported Files: This scroll window lists all previously imported files.
View: This button opens the selected import file and enables you to it within the corresponding application.
Click on the Import command button to import the set disbursement transactions. The following screen shows up:
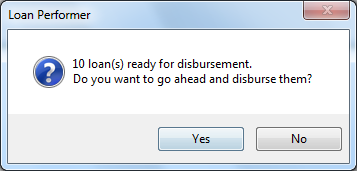
Click on the Yes command button to confirm the importation. The imported file will now be displayed in the Imported Files section. See below:
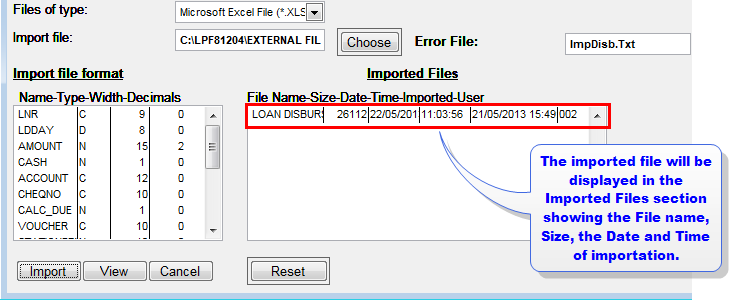
Reset: When you click on this command button, the imported file log will be cleared.
Click on the Cancelbutton to exit.
The Nº 1 Software for Microfinance